
It is no small task. Nor is it rocket surgery or brain science (inside joke). It is, however, a BIG time sucker and a BIG pain (literally) in the neck. I have yet to figure out a way to create miniature, tail-on shrimp without giving myself a major headache from the time spent hunched over my work space. Without a doubt, mini shrimp and mini cherries with stems are the two most time-consuming items from OSS. So, if you have a good block of time, polymer clay, and some aspirin, you might be ready to tackle this project!
You will need polymer clay (I use Sculpey III) in translucent, white, and orange. Blend the translucent and white in a 3 to 1 ratio, and form both this blend and your conditioned orange clay into rolls about 5 mm in diameter. Cut the white blend into sections approximately 2 cm in length and the orange roll into pieces approximately 3 mm long.

Step 1 – Roll Clay and Cut into Small Sections
Roll the orange pieces into small spheres. Attach…are you ready for this highly technical maneuver?…a white piece to an orange sphere by squishing the orange sphere onto one end of a white section. Maneuver complete. Whew. Wipe your brow. The next step is actually a bit trickier. Using the end of one finger, gently roll a white/orange piece of clay against the surface of your work area. I like to work on a large, ceramic floor tile. The goal is to have the orange part roll down into a pointed end so that you have something resembling a small pencil with an orange “lead”.
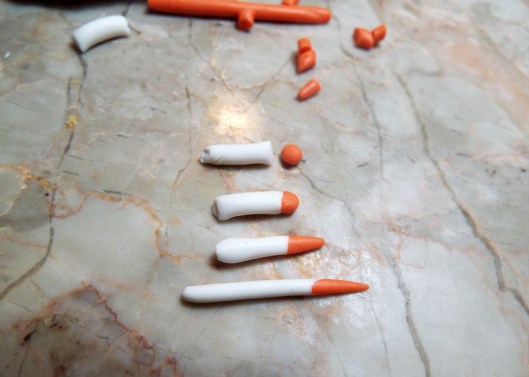
Step 2 – Combine Pieces and Roll into Pencil Shape
You will want the finished white part of the clay pencil to be only about 3 mm in diameter. I use a dental tool for Step 3. A toothpick could be used if you don’t have access to discarded dental tools. Larger needles can also be used. Use your tool to press a groove into the top of the pencil surface. This will resemble the tiny trench left when you have deveined a real shrimp. Slice off the white section for a finished white part approximately 1.5 cm in length.


I use the same tool to create the tail by drawing lines in the clay and pressing slightly downward. A sharp cutting tool is used to cut down to separate the fins of the tail.
Texture the white part of the shrimp with a tightly rolled bit of aluminum foil. Take care not to smash in the groove you previously made in the white shrimp body.
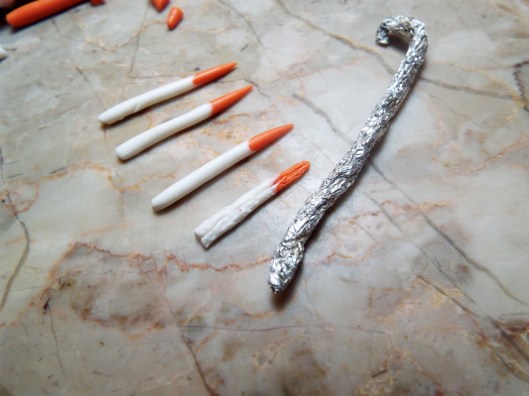
Step 4 – Texture Shrimp with Crumpled Foil
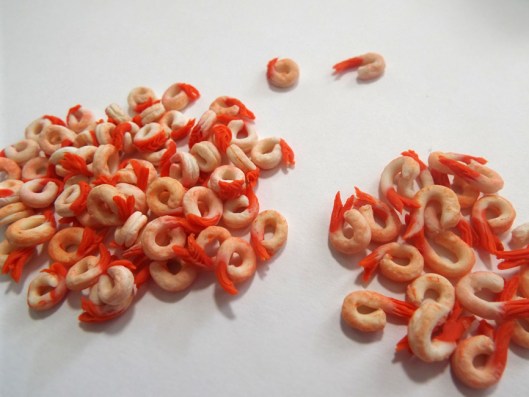
Step 5 – Form the shrimp into the desired shape. I roll them into various shapes: candy canes, rounds with tails sticking out, and complete circles. A good friend thought that, at first glance, the complete circles resembled orange Cheerios!


Step 6 – Before baking, I dust the shrimp with a bit of orange/red chalk pastels to add a little color. I bake all OSS creations in a dedicated toaster oven that lives on a work bench in our garage. NEVER bake polymer clay in an oven used for human foods. I keep my OSS oven in the garage because I don’t like the smell of baking clay. Sculpey III doesn’t give off horrible fumes, but I have a sensitive nose, and I just prefer not to smell it, so, well…there you have it.
After Step 7 baking and cooling, you now have a good number of orange Cheerios! Ha!
Plan ahead! Remember to texture both sides before baking if both sides will show. There is no going back with a baked polymer clay item!
Add details of subtle shading and color with acrylic paints and a tiny brush. OSS strives for realism, so paint my shrimp in several steps. The tails take a darker, reddish brown color blend while the bodies are striped with a lighter coral/orange blend.
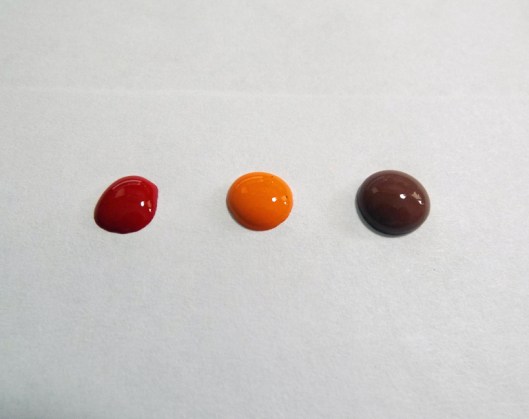
Step 8 – Use Acrylic Paints to Add Details to the Cured Shrimp
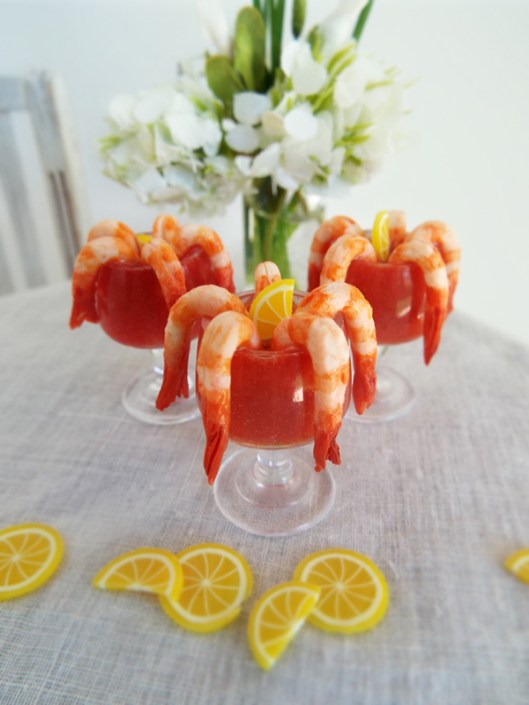
Et voila! OSS mini shrimp in Summer Shrimp Cocktails and the Buffet Bowl! As always, OSS mini food creations are available in the OSS Etsy Store!
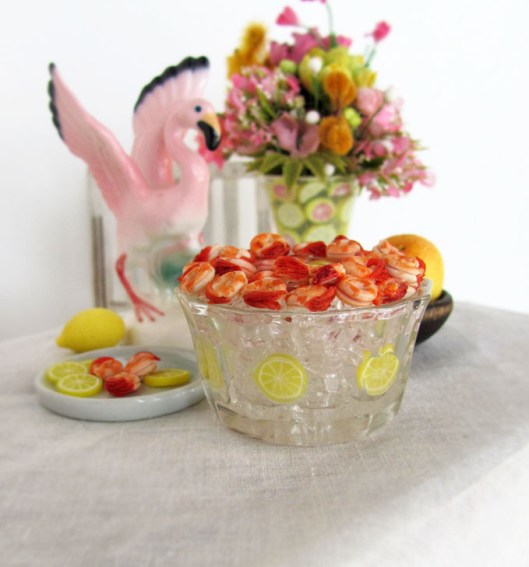
OSS 1:6 Scale Shrimp Buffet Bowl in Vintage Glass

oh GOODNESS!!! they really look amazing, and I love the technical part of what you do, a process to be sure, but the end results are outstanding. I am always amazed at what you come up with to add the texture to the miniatures and you must do a lot of planning and engineering in your sleep. LOL. I know that is how it works for me!
hugs
B
Thanks, sweetie! Yes…I dream in miniature. LOL
Of course, they’re amazing! The process is cwazy. Making you both amazing and cwazy??
Have we met? Oh, yeah… :::smooches:::
Dawn, You are one of the most patient and amazing artists I know!! Hugs!!
Sweet of you, Debi! Thank you!
It’s true!! You’re welcome. 🙂