
So, back in June…holy moly, has it been THAT long ago?…back in June, I posted about using a heated blade to alter pieces of the Sears Kenmore Kitchen set to use in my new kitchen diorama box. Long story short, the dio is still not finished, but it IS getting closer! I had hoped to have it completed before blogging about the process, but at this rate, it could be next Spring before I get it done (I hope not!). This post will take you along on the first part of the journey. I hope the latter part won’t be too far off.
The dio box itself was built by my dh and is about the same size as the one he built for The Mini Guinea. I had him make the kitchen box a wee bit wider but the same height and depth. Here’s a shot of the box before I painted. 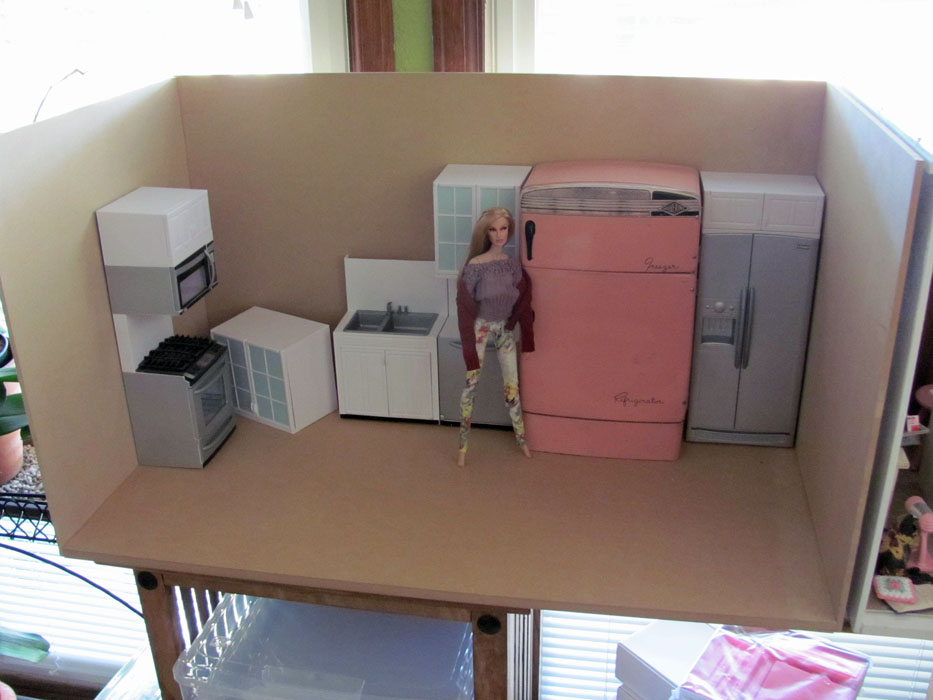 You can see the OSS diva DASHA is thrilled to be getting her own kitchen. The only question she had for me is, “Where are the chef and staff?” Silly DASHA. The cabinet on the floor was removed from the sink unit because I want a window over the sink. Who wants to stare at a blank wall while washing dishes or peeling potatoes? And, as you can see, the cabinet would be pressing against DASHA’s nose if the cabinet had not been removed. My dh would say that “no one” will notice that. You’d think that after nearly 30 years with me he’d realize that “I” would notice, and that’s all that really matters.
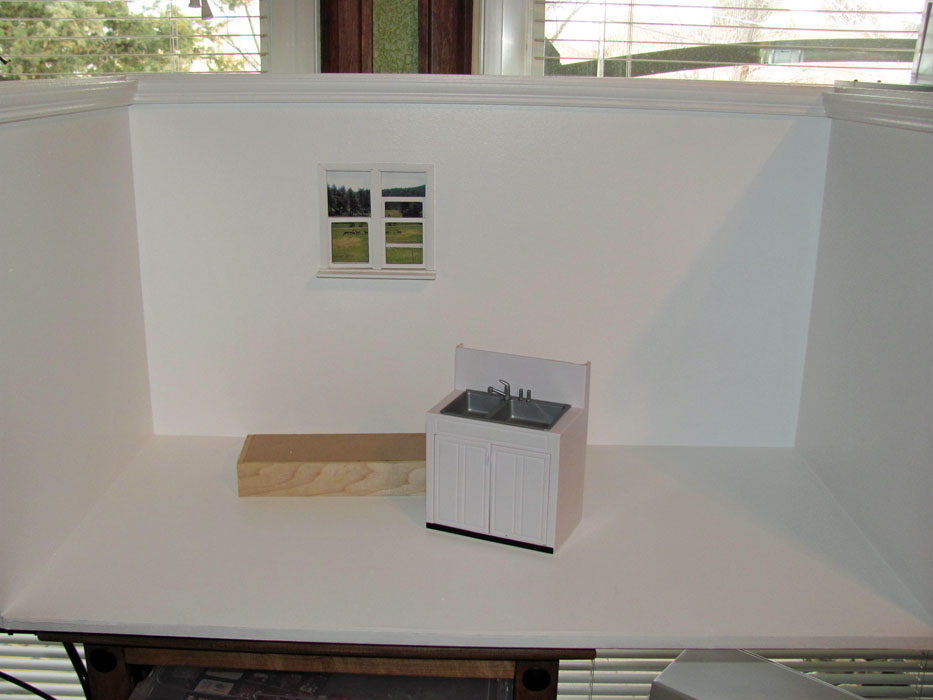
Once I figured out where I wanted the units and the height (you can see a riser in the photo), dh cut the window hole. I used a purchased dollhouse window that actually operates, so the hole was cut specifically for that item. The molding near the top of the box adds interest and will also support the ceiling. I painted everything white and printed off a background so that DASHA would have some scenery to gaze at whilst scrubbing pots and pans. She has assured me that she has no intention of doing any of the aforementioned tasks, but I pay the bills around here, so she will have to pull on a pair of rubber gloves and get busy!
 Next on the agenda was finishing the risers to get the base cabs and counter-tops to a realistic height for the leggy FR ladies. A support shelf for the separate upper cabinet was needed, so dh obliged.
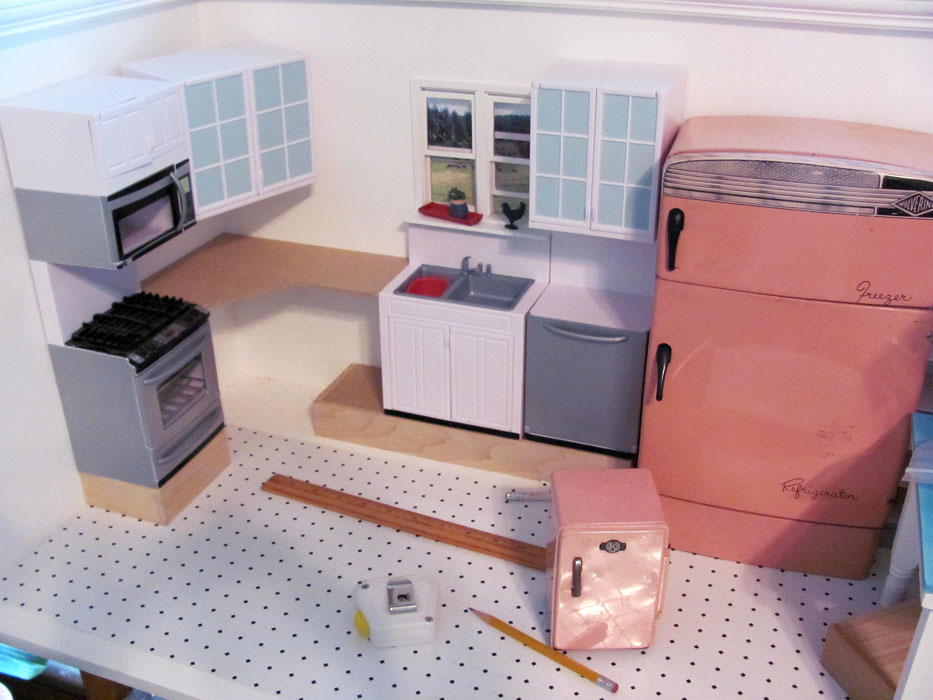
The corner area posed a bit of a challenge. Not only did I want it angled to compliment the upper cabinet, I also wanted a drawer bank included. Needless to say, hubby was NOT thrilled. But, trooper that he is, he endeavored to do my bidding, and I think it turned out fabulously for a first time ever attempt! I gave him permission to make two drawers fixed and two that actually functioned. This enabled him to fudge a bit with the carpentry, and that was fine with me as long as the end product gave me the look I wanted.
The next step was putting up the wallpaper. I used scrapbook paper with a retro feel. And since my major appliances are vintage toys and pink (how AWESOME is that), I chose a paper in shades of pink that would coordinate with the pale blue on the cabinet doors. I also added the retro dollhouse flooring in a black diamond on white pattern. I also removed the doors from the Kenmore fridge unit so I could use it as a pantry. They were easy to pop out of place. No plastic surgery required.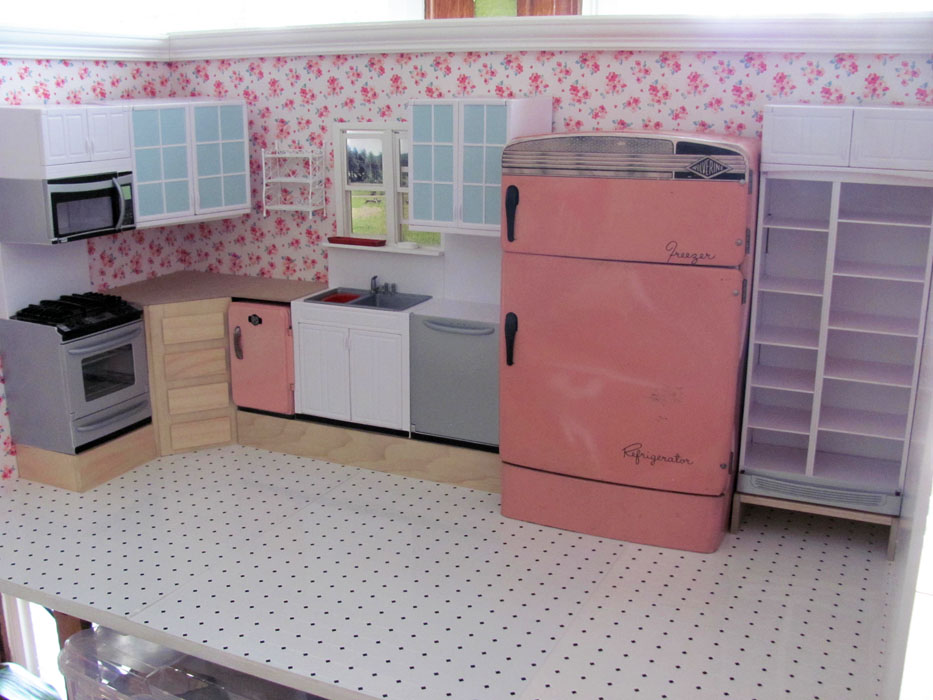 The risers have now been base coated, but that is where this chapter of the kitchen box saga ends. It has been at a standstill now for a few weeks. I need to detail the drawers and do a wee bit of tweaking before I can continue with photos and another post. Hopefully, I can get to that soon! Stay with me, ya’ll!
Until next time with OSS…

Wow, this is very cool Dawn, I love the bank of drawers!! I have this set too, in storage, but I am inspired by your new room design and cant wait to see the final result.
hugs
Thanks, dear Brenda! I have been gathering bits and pieces for this dio for at least 3 years! lol I hope I can finish the detail work in the next month or so. I also bought a couple of extra pieces to this set so I can cut them apart. We’ll see how long THAT takes. Ha!
Fabulousness, as always! DH has some mad mini skills, too–the countertop/drawer bank is terrific. And you’ll get it done. Eventually. 😎
Thank goodness for that word!! LOL Hugs!
This kitchen is so gorgeous, Dawn!! I am jealous. Lol I am curious…..what is the smaller pink appliance supposed to be? I see the stove and microwave, the sink and a dishwasher. The pink ‘fridge and the pantry (cool idea, by the way). But what is the other smaller pink appliance? A trash compactor? Love the way your new diorama is coming along!! Like I said…..jealous!! You are so lucky to have a carpenter for a hubby!! (But so am I, I guess, right? Lol). I know what you mean about this dio being a work in progress for several years!! I am still working on my 1950’s soda shoppe dio as well. But working on them is half the fun!! Can’t wait to see your finished room when it is all done. 🙂
Thanks, Debi! Yes…I know what you mean. 🙂 The smaller pink appliance had to be purchased because it was SO stinkin’ cute! lol I haven’t really decided what it will be in DASHA’s kitchen, but it just had to go in there. It would make a great mini-fridge. I hadn’t thought of the trash compactor. That just might work!
Dawn, BTW, what is the name of that kitchen set that you (and, I guess, Brenda) both have? I am not familiar with that set. Just curious. 🙂
It was a Sears product from a few years ago. It was called the Kenmore Kitchen. Occasionally you can find the full sets or pieces from the sets on Ebay.
I meant that I am lucky to have been able to use your hubby’s skill for the building of my soda shoppe bar!! But I think you know what I meant, right? 🙂
This is working out just perfect and I’m going to be using a few of your ideas!
Have fun!