
And in parentheses…Ho! Ho! Home Sweet Home!
At least a year ago, I purchased a 1:6 scale, Byers’ Choice, holiday fireplace on the secondary. It had a swag of evergreen roping attached at the side posts and in the center. The swag was accented at the three points with holly leaves and red berries. On my fireplace, one of the sets of holly leaves was slightly broken, and even if this had not been the case, I would have still removed the swag because I want to use the fireplace all year long in various scenes. If you’d like to see what the “before” pic should look like, just Google “Byers Choice Fireplace Holiday”. I should have taken my own photo, but I was in such a hurry to get the swag removed that I forgot. My bad. Sorry!
Removing the swag and holly leaves was no easy task. They were not simply glued on, and for those who want sturdy construction on their purchased 1:6 scale items, this is a good thing. But, for those of us who cannot seem to leave things as they are, it was not a good thing. I had to ask dear husband for assistance. Removing the swag was going to take manly tools. The swag was indeed removed with said manly tools; however, what remained were three gaping holes. Um…yeah, not gonna work for me. Nope. So, while I went about otherwise customizing the fireplace, my brain focused on what I would need to fill and/or cover those holes. My first inclination was to fill them, sand them smooth, and then paint the whole shebang. Great idea. However, it didn’t work. I filled the holes with paint-able caulk and spackling. While those products did the trick as far as filling the holes, when sanded, the surface did not come close to matching the existing surface. I could still see where the holes had been. Not happy.

Holes have been filled and sanded, but I don’t like the result!
Plan B: cover the holes. Easy peasy, right? Um…no. A dear friend had sent me some adorable brass cherubs from a recent de-stash. They would be perfect! Um…wrong. They were too wide for the side posts. Bummer. I thought briefly of widening the side posts so that the cherubs would fit, but after discussion with dh, that idea was scrapped. While I mulled that over, I began work on the brick work and firebox. While Byers Choice did a great job with them, I wanted more realistic detailing. Here is the “before” photo (I remembered!).
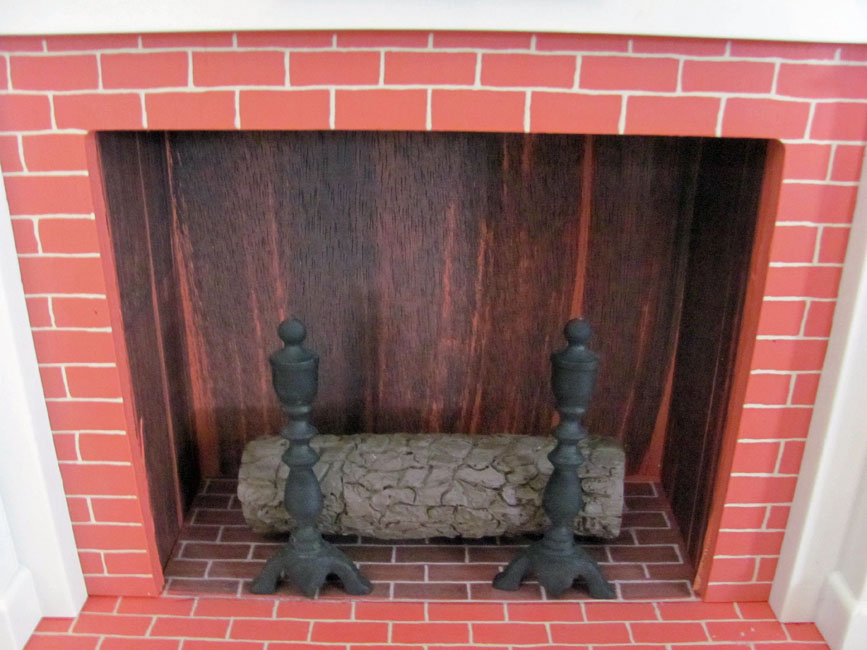
Original Firebox and Bricks
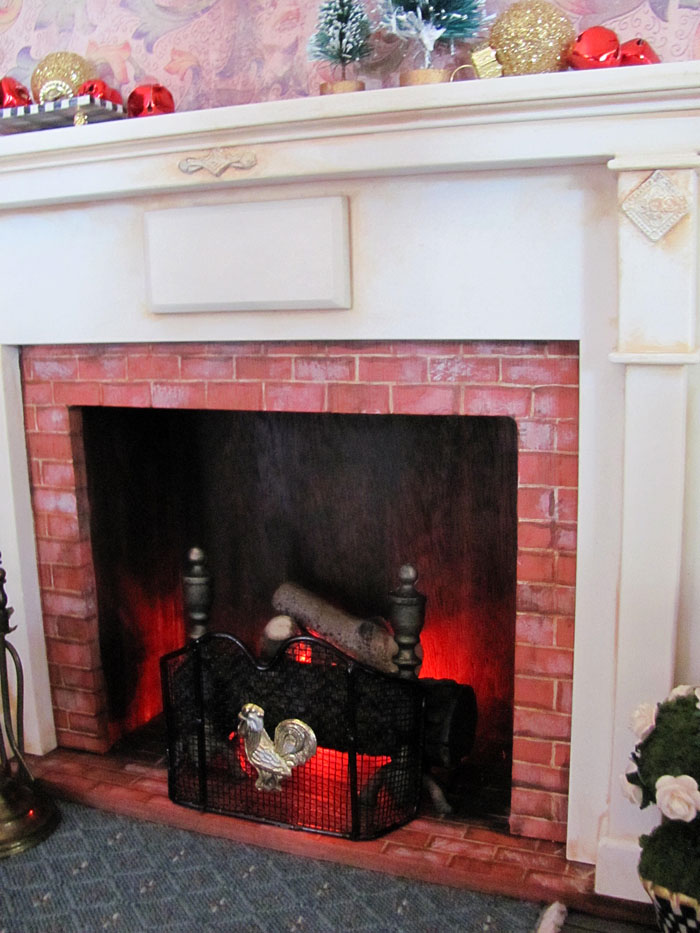
I used acrylic paints to downplay the salmon color. I wanted the firebox to be much darker as it should be “sooty”. The andirons needed a bit of gold showing, and I wanted the log to have more realistic shading. After several colors and coats, it sprang to life! “After” pics can be found further down in this post.
Back to the holes left by the removed swag… I spent a lot of time in my dh’s favorite store, Hobby Lobby. I say that it’s his favorite store only because HE says that it is with so much sarcasm dripping from his words that you need a really big sponge to sop it all up. But, he is a good sport, and he does indeed spend an inordinate amount of time in HL with me, so I willingly mop up the sarcasm with only a wee bit of whining on my part. I spent a long time in HL searching for something suitable to cover the holes in the fireplace. There were numerous items that would work. But, let me clue you in on something in case you don’t already know this about yours truly…I’m PICKY. Wearing your shocked faces? When it comes to my work with miniatures, I won’t settle for “it’ll do” unless I am forced to do so. And so, it took me a good, long while to find just what I wanted. And even then, I bought several different pieces so I could figure out exactly which I liked best. 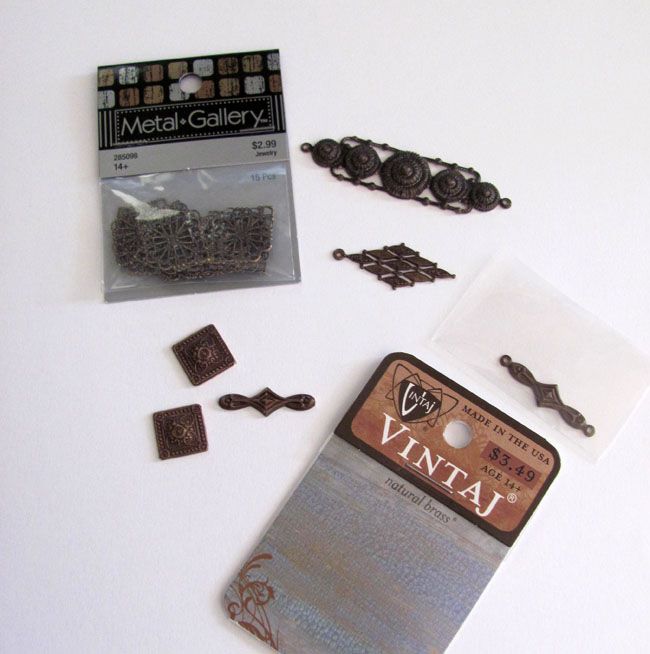 The chosen pieces are metal, and they required some snipping off of the loops before they could be used. The 3 pieces I chose to apply to my fireplace are on the left. You can see the loops on the piece to the right. I glued the pieces over the holes and, once the glue was dry, I painted over them with several coats of soft white acrylic.
 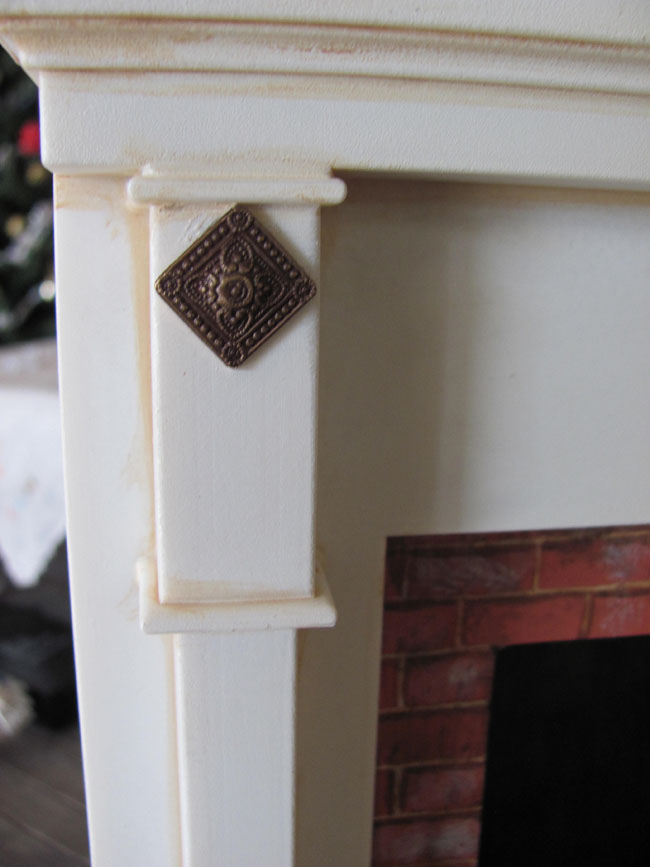 After all of those coats were dry, I gave the entire fireplace a good bit of aging with pale tan paint.
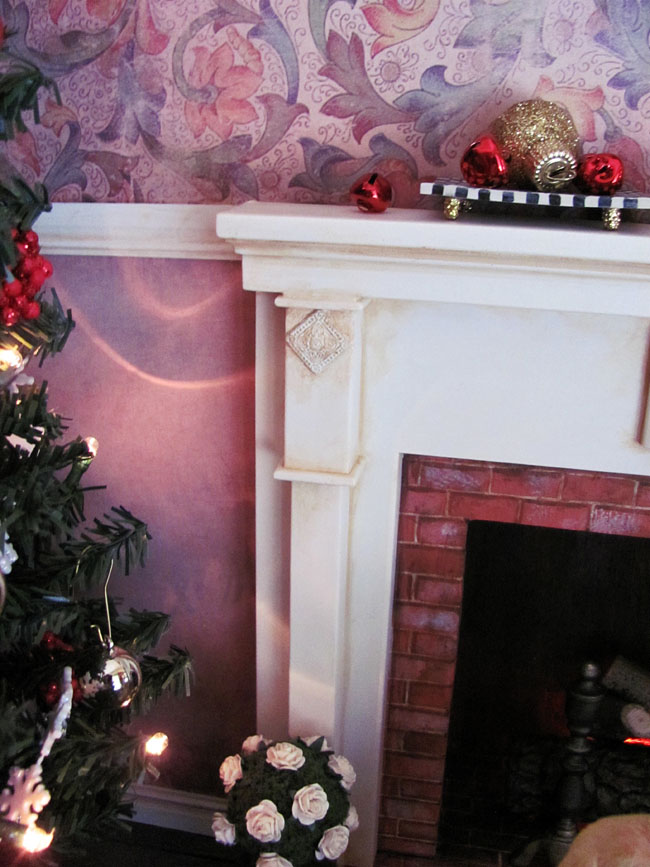 Dh drilled a small hole in the back of the firebox through which I poked a few battery powered red rice lights. I looked for yellow or orange but couldn’t find them so late in the season. I’m thinking orange can be found at Halloween time, so I’ll look next Fall.
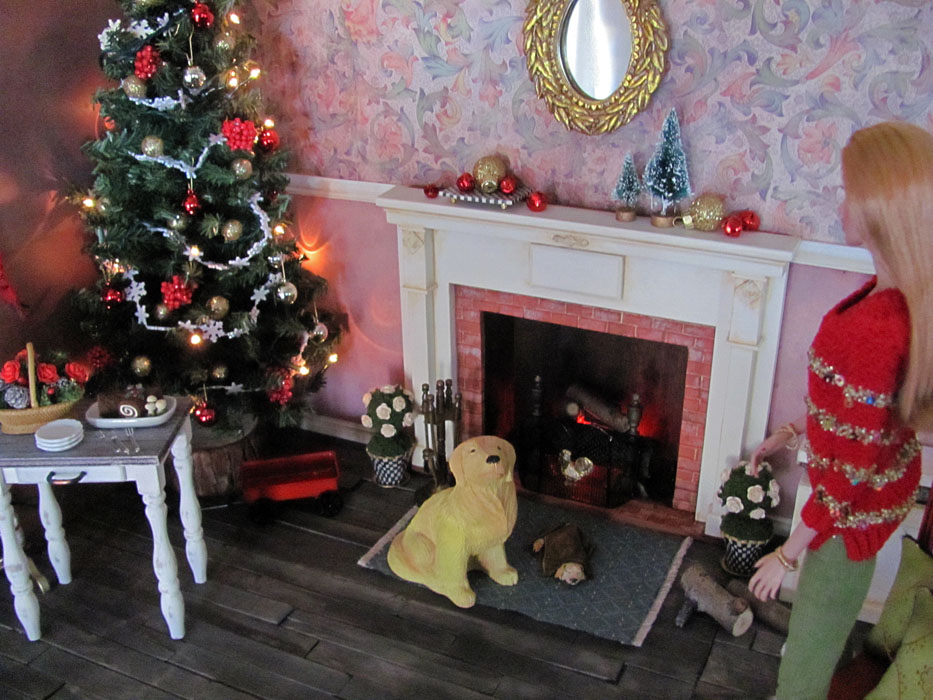
The finished fireplace spawned a room around it! I found the mini fireplace tools and fireplace screen on Ebay and Etsy. The tools are vintage brass and heavy. Love them! The screen is a wee bit too small, but I like the style. I will continue looking for a slightly larger one, but if that search proves fruitless, I can live with this one. And so ends the fireplace revamp. I hope you enjoyed it!
Merry Christmas! And Happy New Year! May 2015 be full of minis and dolls!

That’s awesome, Dawn!! The fireplace was great in original and after your upgrading it’s spectacular. So love how you made it look real and aged.
It surely was worth all the hard work as now it can be used during all twelve months.
Merry Christmas, my dear Dawn!
Thank you so much, Silvana! Hugs! And Merry Christmas to you!
Simply amazing. Not at all surprising, just amazing. Although I don’t believe for one millisecond the “wee bit” of whining. Hee!
Well, I didn’t really define “wee”. There are different sizes of “wee”. That’s my story. LOL
The fireplace looks great! Hobby Lobby is my favorite store too. Lol! Great story by the way. I’m happy you were about to get it completed to your satisfaction. I too am a picky person. It has to be right or I want nothing at all. Lol!
Exactly, Vickey! LOL Thanks for reading and commenting. 🙂